
In Part 1, you ran your flows on whatever device Maestro Cloud picked, in US English. You also saw what that can hide: the login flow passed on newer iPhones but failed on Cloud's default iPhone 11 because the keyboard wouldn't close.
Your users aren't all on one device and they aren't all reading English. A screen that works on Android 14 can break on Android 12. A flow that taps "Login" will fail the day your app ships in French because the button now says "Connexion".
Testing that on your own machine means creating an emulator for every OS version and changing the language by hand each time. Cloud turns each of those into a flag on the same command you already ran.
By the end of this part, you'll know how to:
- Check which devices and OS versions you can run on
- Choose the exact OS version and device for a run
- Run the same tests on several devices or OS versions with one command
- Run your app in another language and write flows that still pass when the text changes
- Handle the time zone, the one setting Cloud has no flag for
💡 Disclosure: Maestro gave me one month of free Maestro Cloud access (2 Android devices, 1 iOS device) for this series. They had no input on this article and everything here including the limitations is my own assessment.
What Can You Change on Cloud?
Each maestro cloud command runs on one device setup. Add a flag to change part of that setup or leave it out and Cloud uses its default:
| Setting | Flag | Example | If you leave it out |
|---|---|---|---|
| OS version | --device-os |
android-34, iOS-26-2 |
Android 13 (android-33), iOS 17.5 |
| Device model | --device-model |
pixel_9, iPhone-17-Pro |
Pixel 6, iPhone 11 |
| Language and region | --device-locale |
fr_FR |
en_US |
| Time zone | ❌ No flag | — | UTC on Android (a flow can change it), US Pacific on iOS |
These flags only work on Maestro Cloud so they need a Cloud plan.
See What's Available
Before you pin anything, list what your account can actually use:
maestro list-cloud-devices

# Or just one platform: android, ios, or web
maestro list-cloud-devices --platform android
Here's the Android part of the output on our account (October 2026):
Android
  pixel_6          android-29, android-30, android-31, android-33, android-34, android-35, android-36, android-37.1
  pixel_6_stock    android-29, android-30, android-31, android-33, android-34, android-35, android-36, android-37.1
  pixel_2          android-35, android-36, android-37.1
  pixel_9          android-35, android-36, android-37.1
  pixel_9_pro_xl   android-35, android-36, android-37.1
  pixel_tablet     android-35, android-36, android-37.1
The iOS list is much longer. It covers iPhones from the iPhone 8 to the iPhone 17 and iPhone Air plus 39 iPads on iOS 16.2 up to iOS 26.2.
But each model only runs some of those versions. Older iPhones stop at older versions and newer iPhones start at newer ones:
iPhone-8     iOS-16-2, iOS-16-4
iPhone-11    iOS-16-2, iOS-16-4, iOS-17-5, iOS-18-2, iOS-26-2
iPhone-15    iOS-17-5, iOS-18-2, iOS-26-2
iPhone-17    iOS-26-2
So before you choose a model and version check that both are on the same line. An iPhone 17 on iOS 18.2 for example isn't available.
💡 Note: this list names models likepixel_6andiPhone-17but they're all emulators and simulators. A model name tells you the screen size and OS not that you're getting real hardware.
👍 Best practice: copy device and OS names frommaestro list-cloud-devicesinstead of typing them from memory. The spelling must match exactly (android-34,iOS-26-2,iPhone-17-Pro) and the list changes when Maestro adds new devices or OS versions.
Every maestro cloud run starts by printing the device it's using and a command to create the same device on your computer:
Maestro cloud device specs:
* Maestro_ANDROID_pixel_6_android-33 - en_US
...
To create a similar device locally, run: `maestro start-device --platform=android --device-model=pixel_6 --device-os=android-33 --device-locale=en_US`
That's handy when a flow fails on Cloud and you want to debug it on the same setup locally.
Pin the OS Version and Device
Android
On Android, set the OS with --device-os and the API level:
maestro cloud --project-id <your-project-id> --app-file app.apk --flows flows/ \
  -e APP_ID=com.wdiodemoapp --include-tags=smoke \
  --device-os android-34
android-34 is Android 14. The number is the API level, not the Android version: Android 13 is android-33, Android 15 is android-35. Android's release notes list the API level for every version.
You can also choose the Android phone with --device-model. Pick a model and an OS version that are on the same line of the device list. The pixel_6 has the widest choice (android-29 to android-37.1) while the newer models only start at android-35 (Android 15):
maestro cloud --project-id <your-project-id> --app-file app.apk --flows flows/ \
  -e APP_ID=com.wdiodemoapp --include-tags=smoke \
  --device-model pixel_9 --device-os android-36
Before the run started, the CLI printed the device it was using: Maestro_ANDROID_pixel_9_android-36, a Pixel 9 on Android 16. The flow passed.
💡 Note: Maestro's Configure the OS page only shows --device-model for iOS but the CLI reference lists Android models too and our run confirms it works.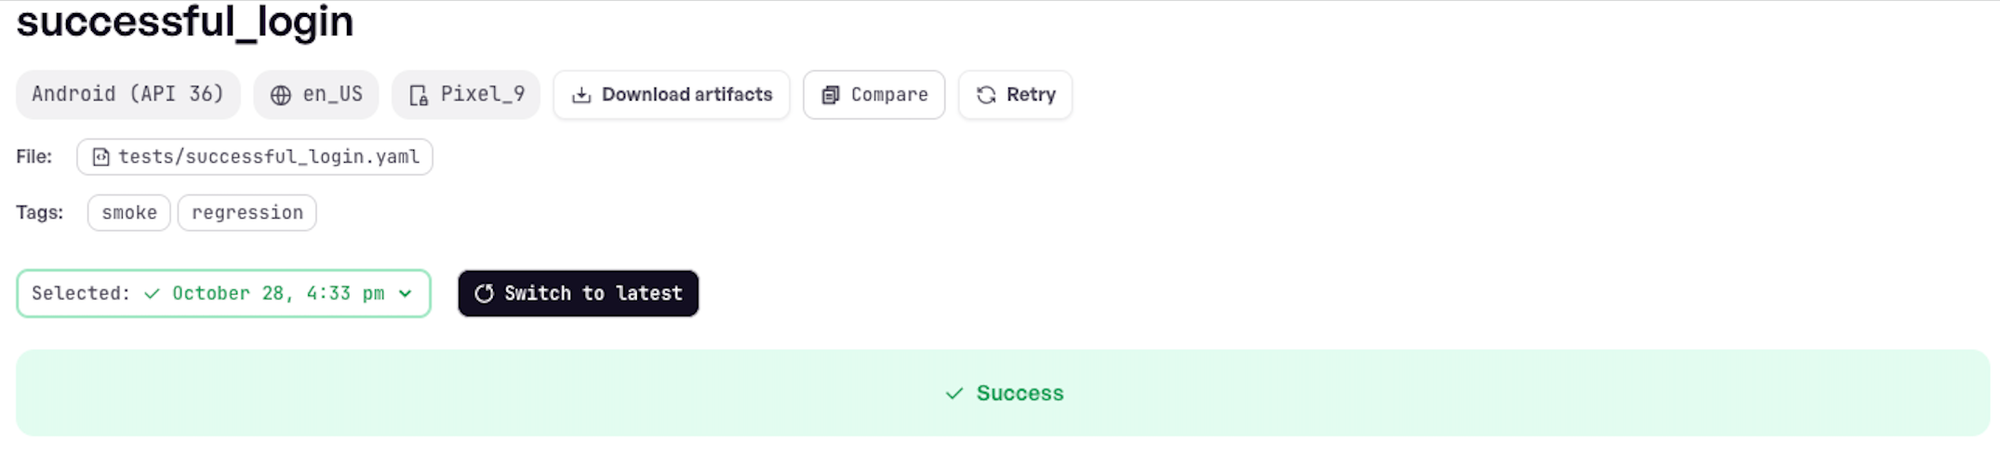
💡 Note: --device-os can also take a full Android system image: the exact Android build the emulator runs named the way Android's SDK Manager names it. Use it only when your app needs a specific image, for example one with the Google Play Store:
--device-os "system-images;android-34;google_apis_playstore;arm64-v8a"Keep the quotes: without them your terminal treats each ; as the end of a command. And expect it to be slow. Our run passed, but it took 3 minutes 36 seconds for a flow that usually finishes in about a minute.
💡 Tip: if you create the local emulator yourself instead of using maestro start-device Maestro's docs recommend the Google APIs system image with the same API level not the Google Play one.iOS
On iOS, set the iOS version with --device-os and the iPhone or iPad with --device-model. Maestro recommends always setting both:
maestro cloud --project-id <your-project-id> --app-file ios.simulator.wdio.native.app.v2.2.0.zip --flows flows/ \
  -e APP_ID=org.wdiodemoapp --include-tags=smoke \
  --device-os iOS-26-2 --device-model iPhone-17-Pro
Notice the hyphens: iOS-26-2, not iOS 26.2.
💡 From our runs: choosing the iPhone really matters. In Part 1, the same login flow failed on Cloud's default iPhone 11 but passed on an iPhone 15, 16 and 17. If you never set --device-model, every iOS run uses the iPhone 11. You'd see the failure every time and never find out that it only happens on that one phone. Set the model to the iPhones your users actually have.⚠️ Watch out: two older flags still show up in examples online and even in the Console. A run's Run on a different device button opens a help box that suggests --android-api-level=34. Both flags are deprecated and will be removed in a future release, so use the new ones instead:| Old flag | Use instead |
|---|---|
--android-api-level |
--device-os, e.g. android-34 |
--ios-version |
--device-os and --device-model, e.g. iOS-26-2 and iPhone-17 |
If you use the old flags anyway:
--android-api-levelstill works in Maestro 2.11.0 but the CLI prints a warning asking you to switch to--device-os.--ios-versiononly let you pick a major iOS version like 17 (not 17.5) and always ran your flows on an iPhone 11.
Run the Same Suite Across Several Configurations
Each maestro cloud call is one upload with one configuration. To cover several OS versions, run it once per version. A short loop does it:
for os in android-29 android-37.1; do
  maestro cloud --project-id <your-project-id> --app-file app.apk --flows flows/ \
    -e APP_ID=com.wdiodemoapp --include-tags=smoke \
    --device-os "$os" --name "smoke-$os"
done
--name gives each upload its own name in the Console, like smoke-android-29, so you can tell the runs apart. We picked the oldest and newest Android versions our account offered: android-29 (Android 10) and android-37.1, the newest available. The smoke flow passed on both.
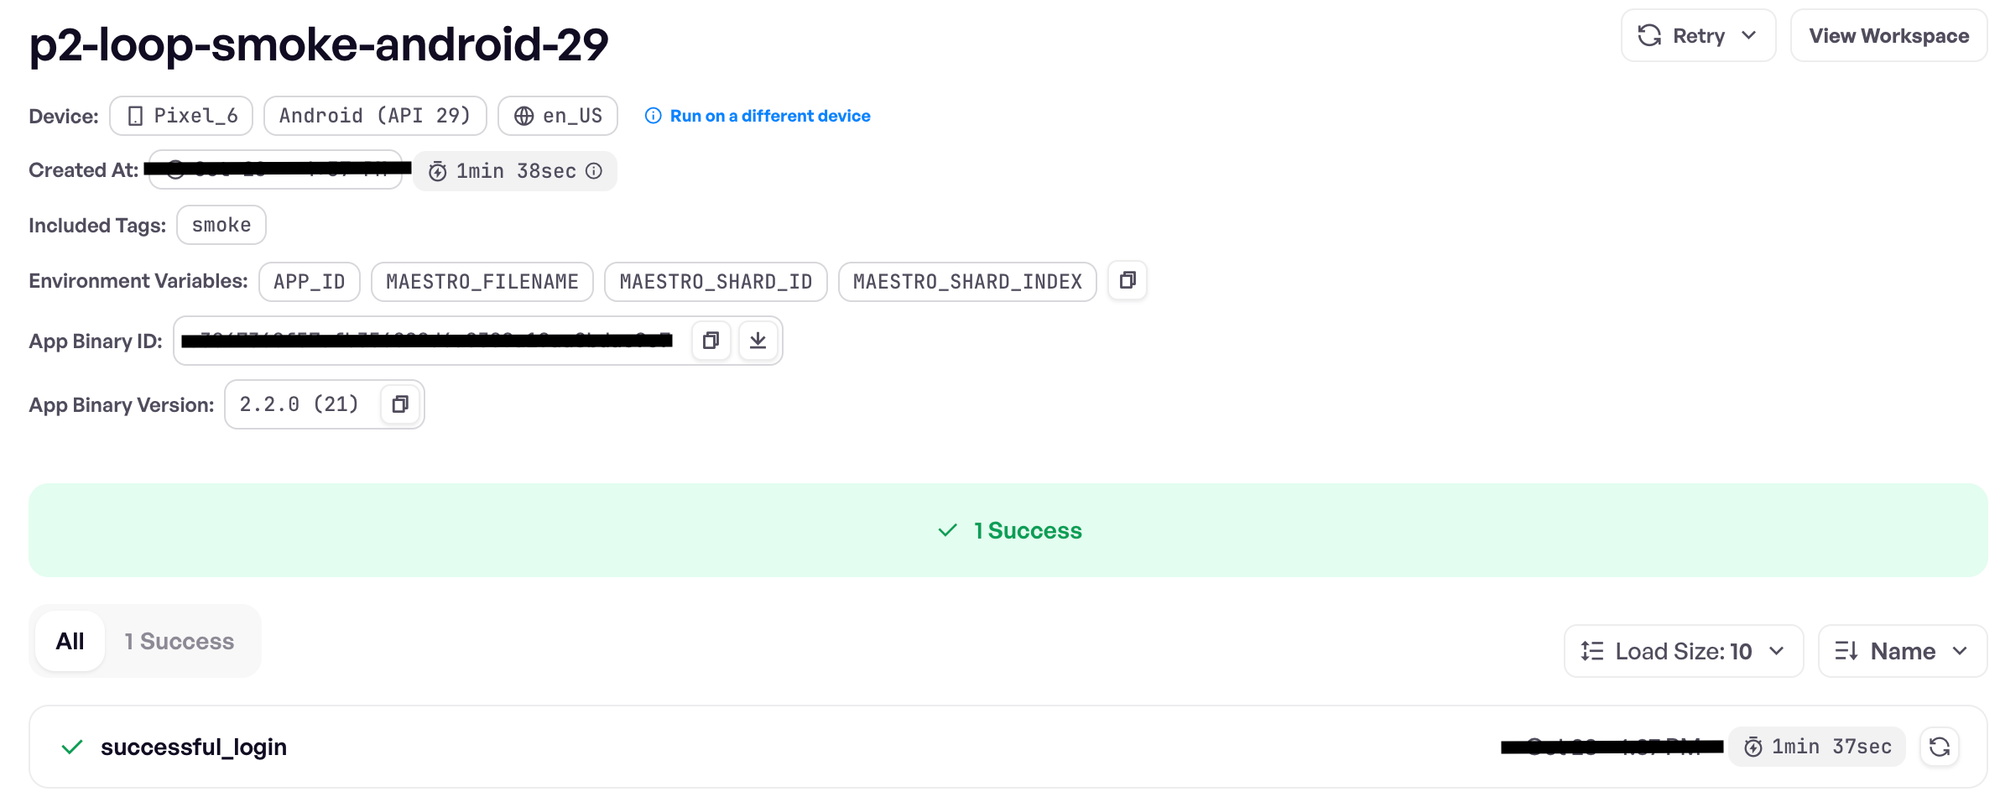
android-29) smoke flow passed. Our runs used a p2-loop- prefix on the upload names.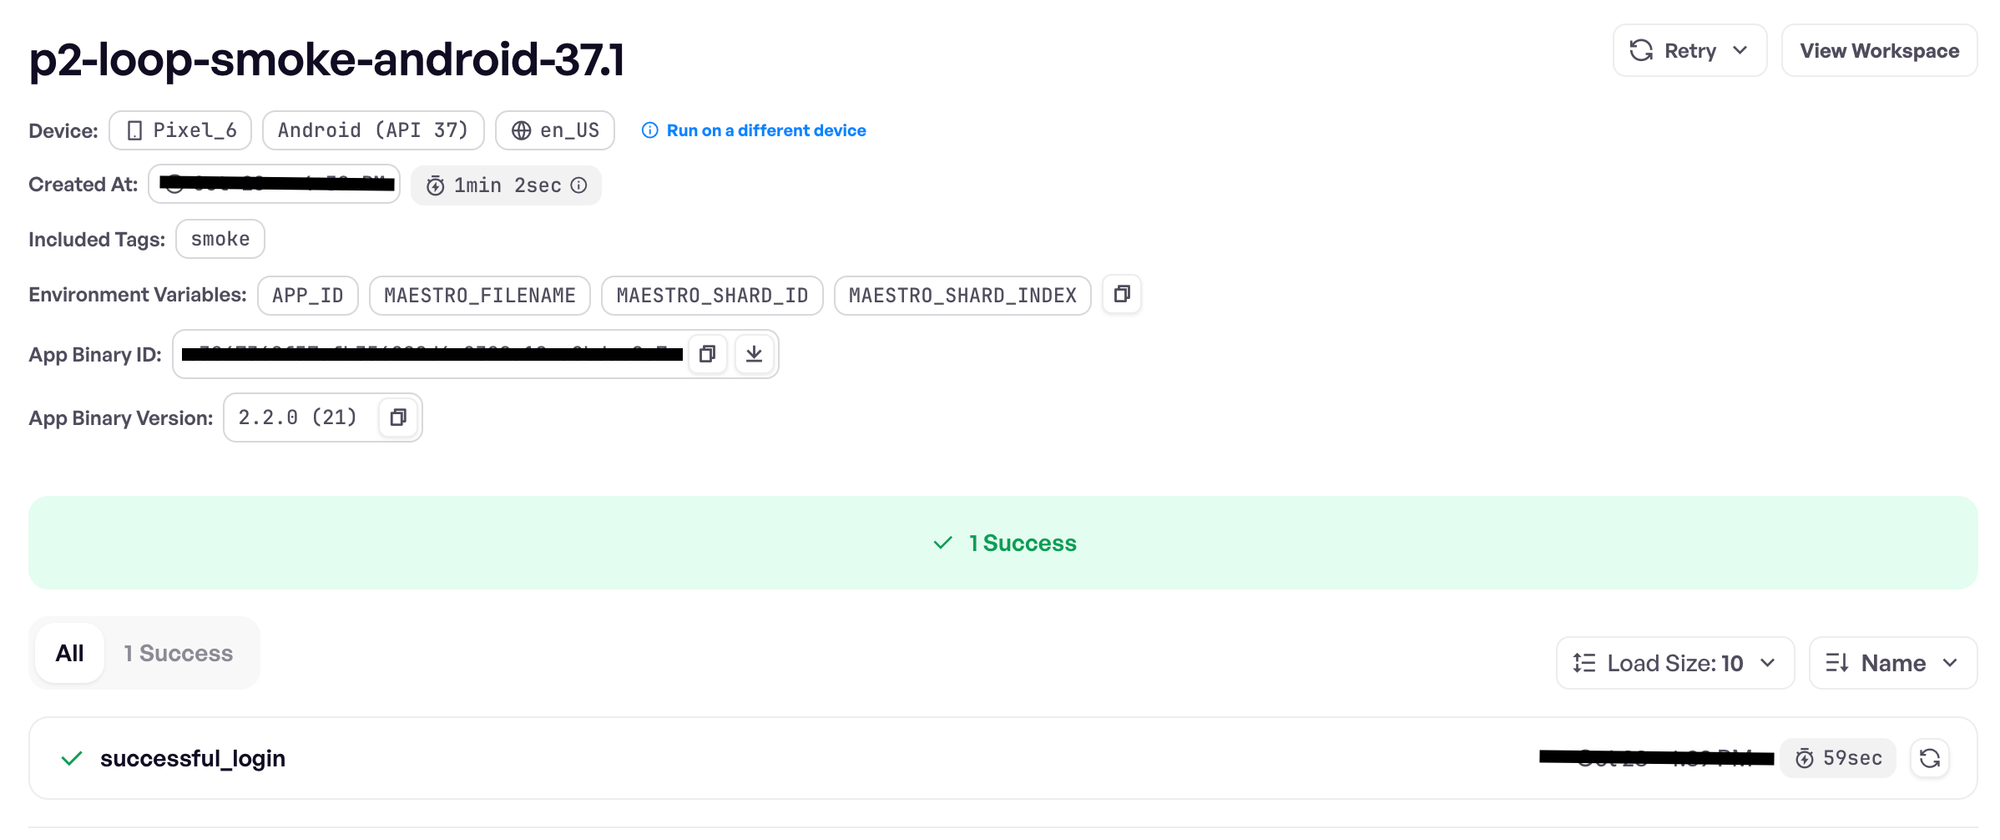
android-37.1 which the Console shows as "API 37". The smoke flow passed here too.The loop took 3 minutes 42 seconds because each maestro cloud command waits for its results before the next one starts. So the second configuration doesn't start until the first has finished even when a second device is free.
Add --async and each command returns as soon as its upload is accepted:
for os in android-29 android-37.1; do
  maestro cloud --project-id <your-project-id> --app-file app.apk --flows flows/ \
    -e APP_ID=com.wdiodemoapp --include-tags=smoke \
    --device-os "$os" --name "smoke-$os" --async
done
With --async the loop finished in about one minute, which is just the time it took to upload the app twice. After that, both runs went at the same time, one on each of our two Android devices. Both results were ready about 2 minutes 7 seconds after the loop started compared with 3 minutes 42 seconds without --async.
⚠️ Watch out:--asynchas two trade-offs. First, the terminal no longer tells you whether your flows passed, so you check the results in the Console. Second, you can't get a report file with it: adding--format(from Part 1) makesmaestro cloudstop withCannot use --format with --async.
⚠️ Watch out: every OS version or language you add is another full run of your tests. Three OS versions × two languages = six runs. Your plan only gives you a few devices at a time, so the runs wait in line for a free one. If you run all of them on every pull request, the queue grows fast. Run them all once a night instead and keep pull requests to one setup. (Part 3 shows how to run Cloud from GitHub Actions.)
💡 Tip: the loop uploads your app again every time it goes round. For a large app, upload it once and reuse it. Everymaestro cloudrun prints anApp binary id:line. Pass that ID with--app-binary-id <id>instead of--app-fileand Cloud reuses the app it already has. With the small demo app, it only saved about a second. With the 100 MB Wikipedia app later in this part, it skips a much bigger upload.
Test Your App in Another Language
Set the device's language and region with --device-locale:
maestro cloud --project-id <your-project-id> --app-file app.apk --flows flows/ \
  -e APP_ID=com.wdiodemoapp --include-tags=smoke \
  --device-locale fr_FR
The value is a language code and a country code joined by an underscore: fr_FR is French (France), de_DE is German, ja_JP is Japanese. Without the flag, Cloud uses en_US. Maestro publishes a list of supported locales. The flag works the same way on iOS.
⚠️ Important: the locale is a device setting, so you can't set it inside a flow or in config.yaml. It's always a flag on the run.A Passing Locale Run Can Prove Nothing
Run the command above and the smoke flow still passes. But that doesn't mean the flow works in French. The WebdriverIO demo app has no French version at all. All its text is in English, so it looks exactly the same on a French device.
Only the phone around the app changes: the keyboard switches to the French layout (AZERTY instead of QWERTY) and the clock at the top shows 24-hour time.
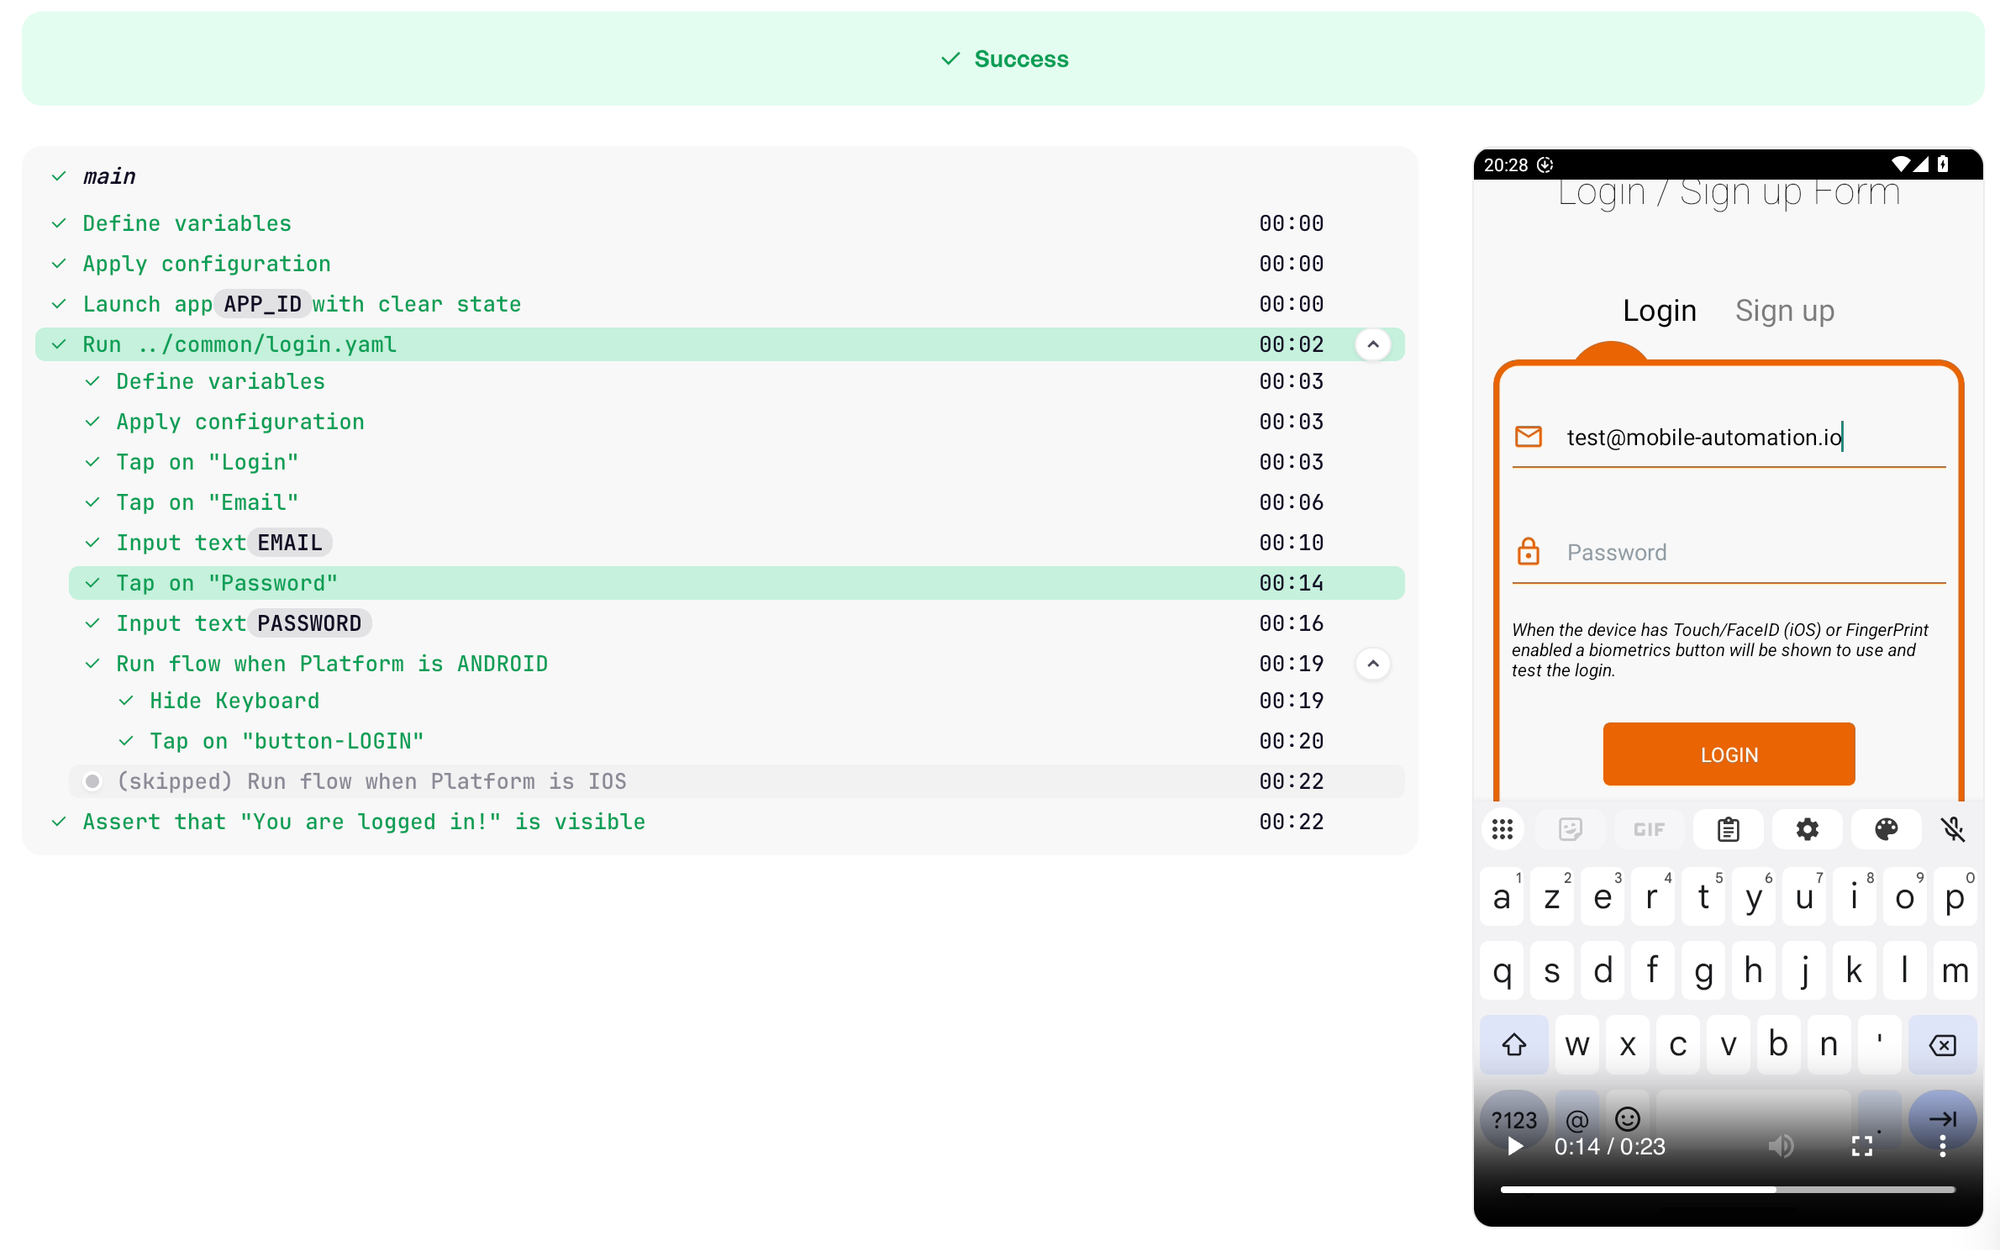
fr_FR) the app is still in English, but the keyboard is AZERTY (top row: a z e r t y) and the clock shows 20:28. The flow passes without testing any French.🚨 Warning: a locale run only tests something when your app is actually translated. Before you trust a green result, open one run's screenshots and check that the app's text really changed.
To see what a real language switch does, we used an app that is translated: the Wikipedia Android app. It's open source, translated into hundreds of languages and follows the device's language. We used version r/50614 from F-Droid.
Here's a short flow for it. It opens the app, waits for the first welcome screen and taps the arrow to move to the next one. Like most flows, it finds each element by its English text on screen:
# flows/language_check.yaml
appId: org.wikipedia
---
- launchApp:
    clearState: true
- extendedWaitUntil:
    visible: "All the world's knowledge"
    timeout: 20000
- tapOn: "Forward"
We ran it twice, once on an English device and once on a French one:
| Device language | Result |
|---|---|
en_US |
✅ Passed |
fr_FR |
❌ Assertion is false: "All the world's knowledge" is visible |
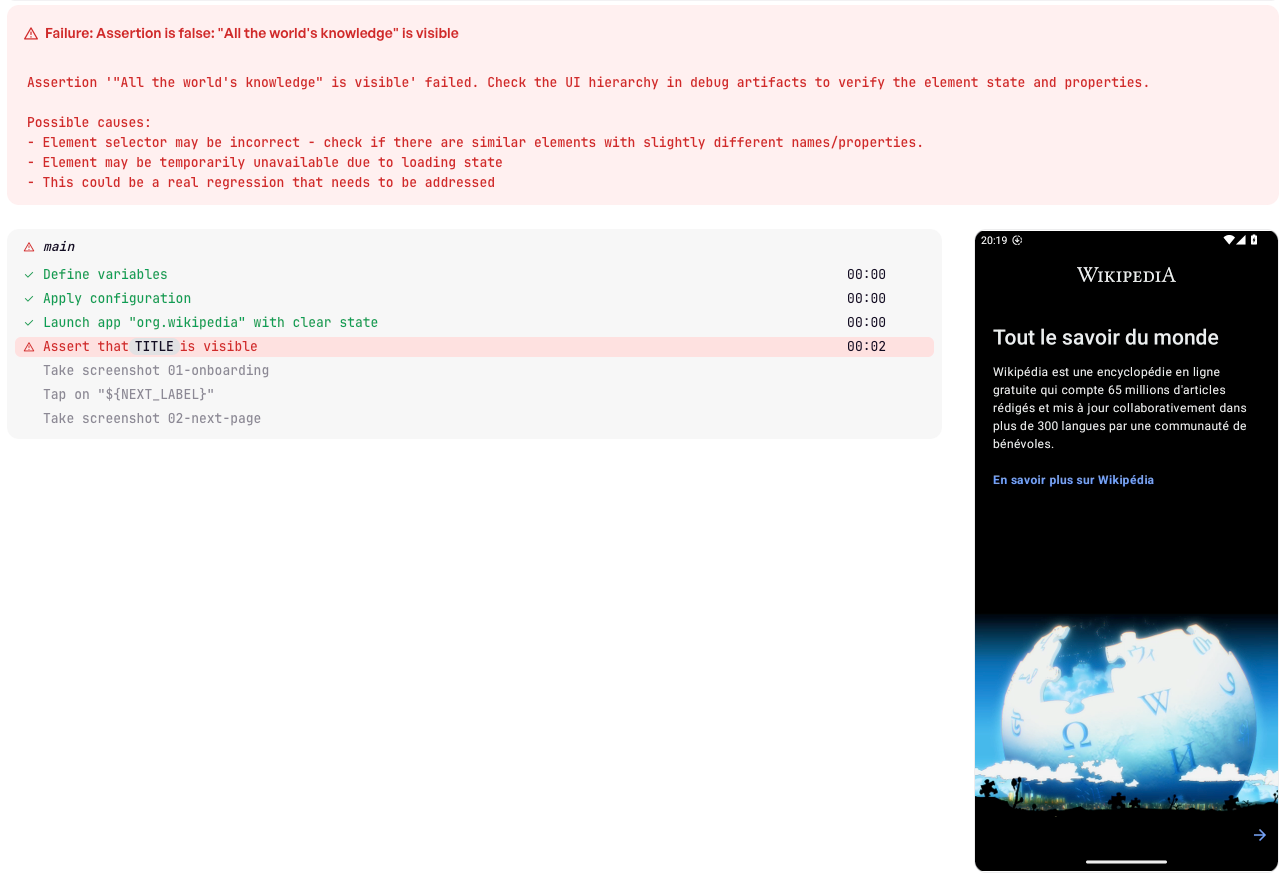
Nothing is wrong with the app. The French screen works perfectly but the flow looks for English text, so it fails on the very first step.
💡 Note: don't guess labels from another language. The arrow at the bottom right of the welcome screen, the one the flow taps has no visible text. Its hidden label is "Forward" in English and "Suivant" in French. To find an element's real label, check it with Maestro Studio or maestro hierarchy on a device in that language.Write Flows That Survive a Language Switch
There are three ways to fix this, from best to quickest:
- Find elements by ID instead of text. An ID stays the same in every language. How to Write Maestro Flows That Don't Break or Repeat Themselves already recommended IDs because they're more stable and this is one more reason. The catch: your app needs them. Wikipedia's welcome screens are built with Jetpack Compose and have no IDs Maestro can see which is common in real apps. If yours is the same, ask your developers to add a
testTagto each element and turn ontestTagsAsResourceId, so testing tools can see it - Android's docs. - Pass the text in for each language. Keep one flow but replace the on-screen text with placeholders like
${TITLE}. Then fill them in with-ewhen you run it, the same way you already passAPP_ID. Here it is with the French text and it passed on the French device:
- extendedWaitUntil:
    visible: ${TITLE}
    timeout: 20000
- tapOn: ${NEXT_LABEL}
maestro cloud --project-id <your-project-id> --app-file wikipedia.apk \
--flows flows/language_check.yaml --device-locale fr_FR \
-e "TITLE=Tout le savoir du monde" -e NEXT_LABEL=Suivant- Match both languages at once. Text selectors are regular expressions, so
tapOn: "Forward|Suivant"works on either device. It's quick for two languages, but hard to read once you have five.
Some checks should be language-specific, like "the French welcome message appears". Keep those in separate flows, tag them and run them only with the matching locale. That's the approach Maestro's docs recommend, here applied to Wikipedia in both languages:
# flows/tests/welcome_en.yaml
appId: org.wikipedia
tags:
  - english
---
- launchApp
- assertVisible: "All the world's knowledge"
# flows/tests/welcome_fr.yaml
appId: org.wikipedia
tags:
  - french
---
- launchApp
- assertVisible: "Tout le savoir du monde"
# Each language's flows run only on a device in that language
maestro cloud --project-id <your-project-id> --app-file wikipedia.apk --flows flows/ \
--include-tags=english --device-locale en_US
maestro cloud --project-id <your-project-id> --app-file wikipedia.apk --flows flows/ \
--include-tags=french --device-locale fr_FR👍 Best practice: use IDs for anything you tap or type into and save visible text for checks on what the user should read. Then one set of flows covers every language and only the text checks need a version per locale.
Run It Locally First
You can try another language on your own computer before using Cloud. The trick is to set the language when you start the device, not when you run your flows. maestro test has no --device-locale flag but maestro start-device does:
maestro start-device --platform android --device-locale fr_FR
maestro test flows/ --include-tags=french
The device keeps that locale for every run until you start a new one. Cloud's advantage is doing this across many locales and OS versions without managing a device for each.
Time Zones: No Flag and Fixed on iOS
Cloud's devices run in Las Vegas and there's currently no flag or config setting for their time zone. Each platform starts on a different one, as Maestro's docs explain:
| Platform | Time zone on Cloud | Can a flow change it? |
|---|---|---|
| Android | UTC (+00:00), confirmed in our runs | ✅ Yes, through the Settings app |
| iOS | US Pacific Time (the docs say GMT −7) | ❌ No |
This has two effects:
- Android and iOS show different times. For example, at 2:00 UTC on October 31, the Android device shows October 31 but the iOS device, 7 hours behind still shows 7:00 PM on October 30. A flow that checks "today's date" can pass on Android and fail on iOS during those hours.
- By default, you only see two time zones. If your app shows store hours, booking times or reminders, Cloud shows you the UTC and Pacific versions. A user in Montreal or Paris sees different times. On Android you can fix that with a flow (below). On iOS, Cloud can't check it for you.
👍 Best practice: don't assert exact dates or times in flows that run on Cloud. Match a pattern instead of "October 23" or "9:00 AM". Text selectors are regular expressions as How to Write Maestro Flows That Don't Break or Repeat Themselves covered, so a pattern works directly. Two things to get right. First, the pattern must match the element's whole text, so end it with .* to allow for anything after the time, like "AM". Second, include the words around the time:
- assertVisible: "Opens at \\d{1,2}:\\d{2}.*"🚨 Warning: don't use a time pattern on its own like "\\d{1,2}:\\d{2}". On Android, Maestro also reads the clock at the top of the screen, so the pattern matches that instead. We tried it on the demo app, which shows no time anywhere and it still passed. Always include the words around the time, like "Opens at" above.
Change the Time Zone on Android
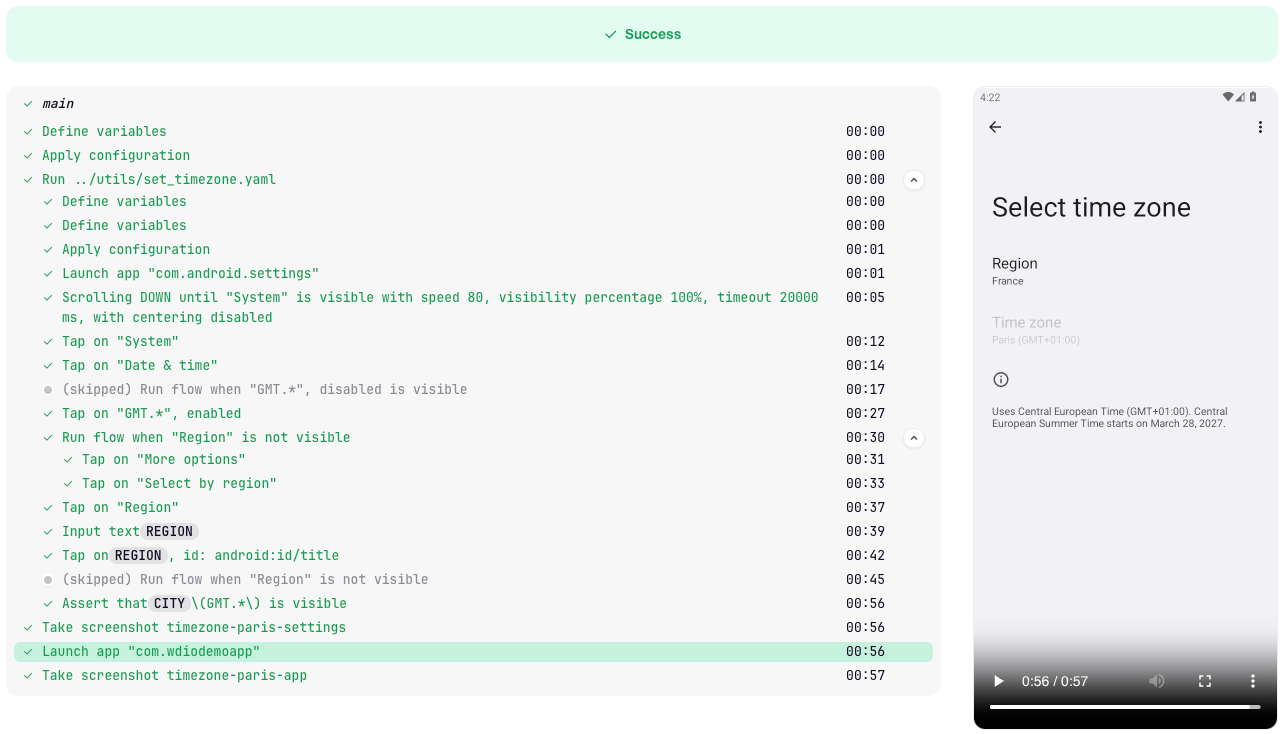
An Android flow can change the time zone the same way a user would: open Settings, go to System › Date & time, turn off Set automatically and pick a new time zone. Maestro publishes a ready-made recipe for this. It has two flows: one sets a time zone by region and city (like United States › New York), the other sets a fixed UTC offset (like GMT-05:00).
Save the recipe's set_timezone.yaml in a utils folder next to your tests. Then run it as a subflow before launchApp, so your app starts with the new time zone. Here we set the device to Paris:
# flows/tests/timezone_paris.yaml
appId: com.wdiodemoapp
---
- runFlow:
    file: ../utils/set_timezone.yaml
    env:
      REGION: France
      CITY: Paris
- launchApp
The recipe ends by checking that Settings shows the city you picked, Paris (GMT+01:00) here, so the flow fails if the time zone didn't change. We ran it on Cloud's default Pixel 6 with Android 13 and on Android 14 (--device-os android-34). It passed on both, in about 1 minute 35 seconds each and that's before your own test steps. Most of that time goes to tapping through Settings.
⚠️ Watch out: the recipe has some limits according to Maestro's docs:
- Maestro tested it on Android 14 to 16 (API 34 to 36). It also worked on Cloud's default Android 13 in our run but older versions may name the Settings screens differently and the flow would need adjusting.
- The UTC offset list only has whole hours, so it can't set a zone like India (GMT+05:30). Use the region flow for those.
- The device keeps the new time zone after the flow ends, so put the subflow at the start of every flow that needs it.
It's slower than a flag would be, since every flow first taps through Settings. But it lets Cloud check what a user in Paris or Montreal sees.
Test Other Time Zones Locally
On iOS, Cloud can't change the time zone at all, so test it on your own machine, where you control the clock. Android works locally too:
- Android: start the emulator with
-timezoneand a time zone name such asEurope/Paris:
emulator -avd Pixel_9a -timezone Europe/Paris- iOS: the Simulator uses your Mac's time zone and has no setting of its own. To test another one, change your Mac's time zone in System Settings › General › Date & Time.
💡 Tip: if you don't change anything, your emulator and Simulator use your computer's time zone. So on your machine, your flows see your local time. On Cloud, they see UTC on Android and Pacific Time on iOS. That's why a date check can pass on your machine and fail on Cloud.
Quick-Reference
| Need | Command / setting |
|---|---|
| List devices and OS versions | maestro list-cloud-devices (--platform android|ios|web) |
| Pin Android version | --device-os android-34 |
| Pin iOS version and device | --device-os iOS-26-2 --device-model iPhone-17-Pro |
| Change language and region | --device-locale fr_FR (default en_US) |
| Label an upload | --name "smoke-android-34" |
| Start several runs without waiting | --async (no --format report) |
| Reuse an uploaded app | --app-binary-id <id> |
| Try a locale locally | maestro start-device --platform android --device-locale fr_FR, then maestro test |
| Change the time zone | No flag. Android: Settings subflow before launchApp. iOS: not possible on Cloud (US Pacific) |
What's Next?
You can now run your tests on the OS versions, devices and languages your users actually have. You also know how to handle the time zone: change it with a flow on Android and test it locally on iOS.
So far, you've started every run from your terminal. In Maestro Cloud, Part 3, Cloud runs by itself on every pull request through GitHub Actions. You'll block merges when a flow fails, see what happens when two pull requests reach Cloud at the same time and keep secrets safe when your flows run on Maestro's machines.


Discussion